Showing posts with label homemade. Show all posts

Thursday, April 16, 2015

Simple, All-Natural Homemade Toothpaste


We all know about eating healthy and as organically as we can, but now I am concerned about a new issue. It seems some studies claim fluoride, when taken daily, can be toxic. Since most of us receive fluoride unwillingly and unknowingly in our water supply, having it in our toothpastes can lead to overexposure. It is not a nutrient, therefore our bodies do not require it.  Dr. Joseph Mercola has found that too much fluoride affects children's IQ, causes thyroid issues, and can even cause cancer. Most of Europe -- 97% -- has banned it from their water supply, and the claims that it fights tooth decay are also being questioned.

These concerns led me to create my own toothpaste, which tastes just as good as the commercial brands. I make the paste with coconut oil, which is known to be antibacterial and helps guard against tooth decay. If you want more of a whitening paste, add a drop of hydrogen peroxide.

Here is the recipe. It's great fun to make with the sprites!

Ingredients:
  • 3 tbs Organic Baking Soda
  • 3 tbs Coconut Oil
  • 20 drops of peppermint or cinnamon oil
  • 2 tsp glycerin
  • a few drops of stevia or one packet of xylitol (which also fights tooth decay)

Monday, October 27, 2014

Natural Moisturizers for Winter Skin Care

Keep your skin glowing through the dry winter days. Try these natural moisturizers for winter skin care.


Plant-derived oils and naturally sourced fats and ingredients are better for your skin and body than chemical preservatives and stabilizers. Along with the rest of nature, our skin changes as the seasons turn. With winter comes low humidity, which strips skin of its natural moisture, leaving it dry and more susceptible to damage. To protect your skin from the cold, turn to natural moisturizers with healing natural ingredients.

Four Homemade Moisturizers


Moisturizing Basics for Winter Skin Care

When choosing a commercial moisturizer, your first consideration should be your skin type. For oily skin, use a light moisturizer; for normal to oily skin, use a moisturizing lotion; and for dry skin, use a moisturizing cream.

Next, analyze a product’s ingredient list: Nearly every moisturizer contains some combination of emollients, humectants, emulsifiers, “active ingredients” and penetration enhancers.

Emollients, such as phospholipids and lecithin, soften, heal and hydrate. Plant oils such as olive, castor, jojoba and coconut make great emollients because they mimic the soothing oils our own skin produces.

Humectants attract moisture to the skin. Look for moisturizers made with glycerin and sorbitol derived from natural sources. (To find out if the ingredients are from natural sources, consult the ingredients list or peruse the company’s website.)

Emulsifiers are used to keep the ingredients in a moisturizer from separating. Lanolin is an excellent natural emulsifier. Similar to the natural oil in human skin, lanolin, commonly called wool fat, is a fatty substance naturally produced in sheepskin. It coats wool, acting as a protective agent against cold and dampness, and is extracted from shorn wool by centrifugal separators. This cream, which can be found at any health-food store, is typically used in moisturizers as a water-absorbing emulsifier.

A product’s “active ingredients” are usually responsible for providing its advertised effects, such as soothing, treating blemishes or preventing signs of aging. For example, zinc oxide is a natural active ingredient that protects against sun damage. Be careful when choosing skin products purported to remove wrinkles, blemishes or dark spots: These often contain harsh chemicals. To find out more about natural active ingredients, see “The Best Active Ingredients in Moisturizers” further in this article.

Penetration enhancers help a product’s active ingredients absorb into the skin. Look for moisturizers with natural penetration enhancers such as essential oils (menthol or chamomile are common), vegetable squalene, linoleic acid and oleic acid rather than synthetic penetration enhancers such as propylene glycol and tetrasodium EDTA.

Avoid poor-quality ingredients such as mineral oils, harsh chemicals, and artificial colors and fragrances. Harsh chemicals such as parabens, formaldehyde and propylene glycol are often used to give moisturizers a longer shelf life and help them absorb into the skin, but they can have side effects ranging from skin irritation to potential reproductive disorders. You can find effective, safe natural moisturizers or make your own simple, inexpensive moisturizer using this Homemade Moisturizer Recipe. For more information on ingredients in personal-care products to avoid and extensive listings of safer options, read Come Clean: Natural Alternatives to Chemical-Laden Personal-Care Products.

5 Moisturizer Ingredients to Avoid

  • Formaldehyde: A human carcinogen; watch for ingredients dimethyl-dimethyl (DMDM) hydantoin, imidazolidinyl urea, diazolidinyl urea, sodium hydroxymethylglycinate, and 2-bromo-2-nitropropane-1, 3-diol or bronopol
  • Fragrance: Usually contains phthalates, linked to hormone disruption, possible birth defects, infertility and breast cancer
  • Parabens: May cause reproductive disorders and has been detected in breast cancer tissue; watch for any ingredient ending in -paraben
  • Propylene glycol: May cause hives, allergic reactions and other skin irritation in concentrations as low as 2 percent; synonyms include PPG, 1,2-dihydroxypropane, 2-hydroxypropanol, methylethyl glycol, 1,2-propanediol, and propane-1,2-diol
  • Retinyl palmitate and retinol (vitamin A): Rich in antioxidants and anti-aging properties; may also speed up the development of cancerous skin tumors when exposed to the sun; excessive amounts may be toxic to a developing fetus if pregnant women are exposed

The Best Active Ingredients in Moisturizers


  • Anti-aging: Boswellia serrata, CoQ10
  • Antibacterial and antifungal: Tea tree oil
  • Anti-irritants: Comfrey leaf and root, Aloe vera, licorice root, marshmallow root, chamomile, white willow bark, vitamin C
  • Soothing: Aloe vera, licorice root, green tea, chamomile extract
  • Sun protection: Zinc oxide, titanium dioxide

Tuesday, August 26, 2014

12 Recipes for Healthy Homemade Chips


Crunchy and salty, how we love this snack time power couple! There’s no substitute for the crave-worthy flavor and satisfying texture that make carb-centric snacks so delicious. But store-bought chips are usually fried in an unhealthy amount of oil, which packs a significant amount of fat. Instead, try baking your own homemade chips by using vegetables, fruits and whole-wheat pitas. We’ve rounded up this list of healthier chip recipes that will certainly cure your case of munchies. Just don’t forget some salsa, hummus or dip!

http://blog.jchongstudio.com/2013/04/sweet-potato-baked-chips-with-orange.html

Baked Sweet Potato Chips with Orange and Thyme

Orange juice and blood orange zest give an unexpected twist to the classic sweet potato chip. If you need to use more than one baking sheet, make sure to adjust the 20-minute bake time accordingly. Bonus: These are paleo-friendly!

http://www.hiddenfruitsandveggies.com/2013/08/19/easy-homemade-pita-chips/

DIY Pita Chips

It’s quick and easy to make your own pita chips, and this recipe tells you the how much of each spice is optimal for seasoning. Try adding Parmesan if you want a cheesy taste, or use nutritional yeast if you’re vegan. We recommend using whole-wheat pitas for a serving of heart-healthy whole grains.

http://littleferrarokitchen.com/2013/05/homemade-taro-chips/

Homemade Taro Chips

Known as the “potato of the tropics,” taro is a purple root vegetable that’s a good source of vitamins B6 and C. Eat these sophisticated chips au natural or class them up for a party by using them as a crunchy base for salmon tartar.

http://kristaandmichele.com/garlic-bread-spinach-chips/

Garlic Bread Spinach Chips

Breadcrumbs, Parmesan and garlic give green leaves a kick in this savory snack that delivers a healthy serving of iron. Don’t skimp on the olive oil otherwise the delicious seasoning won’t stick to the spinach. And, be sure to use parchment paper on your baking sheet so your chips don’t burn.

Photo and Recipe: Veronica / The Vegetarian Ginger

Baked Cinnamon Apple Chips

Transform your apples into a cinnamon-y sweet treat! This recipe requires a three–hour baking and cool time, but the end result is worth it. We say fitting in a workout is the best way to make the time pass!

 Photo and Recipe: Dana / Minimalist Baker

Baked Chili Cheese Fritos

Tortillas, spices and olive oil come together to give your taste buds a spicy punch in this gluten-free and vegan recipe. It’s got all of the flavor and none of the suspicious ingredients found in the store-bought version that used to turn your fingers orange. Sprinkle these crisps on to chili or a hearty winter soup.

 Photo and Recipe: Belinda / The Moonblush Baker

Tofu Chips with Sesame and Miso

Asian-inspired seasoning made of miso paste and sesame seeds will take time to make, but the savory umami flavor is sure to get your taste buds’ attention. Pro tip: Make sure to press your tofu to release excess liquid before slicing it.

 Photo and Recipe: Amy / Kid Cultivation

Beet Chips with Curried Yogurt Dip

The sweetness of beets enhances these veggie crisps. To save some calories, skip the frying and bake these instead. They’ll pair perfectly with a mild dip that’s got extra protein from Greek yogurt.

 Photo and Recipe: Karielyn / The Healthy Family and Home

Lemon Dill Zucchini Chips

Tart taste lovers, rejoice! Lemony flavor steals the spotlight in this recipe. To slice your zucchinis as thin as possible to reduce baking time, use the thinnest setting on a mandolin slicer.

 Photo and Recipe: Zach and Clay / The Bitten Word

Microwave Sweet Potato Chips

If you don’t have an oven or a dehydrator, you can still make homemade chips with minimal equipment and ingredients. To prevent burning, make sure you keep a close eye as your sweet potato slices bake for 8 minutes or so since some microwaves emit an uneven amount of power.

Photo and Recipe:  Branny Boils Over

Hint of Lime Baked Tortilla Chips

A dash of citrus ups the ante on your standard Tex-Mex spread. The secret? Bake tortillas until they start to crisp, sprinkle them with a zest and salt mixture and then return to the oven for a few final minutes… Olé!

Photo and Recipe: Jaymee / E is for Eat

Pita Cups with Homemade Hummus

Though not technically a chip, these pita cups make a unique — and healthy! —  appetizer. Use an empty can or cup to make circular pita rounds, press them into muffin tins and voilà! You’ve got yourself a handy little cup just begging to be filled with hummus, salsa or artichoke dip.

Monday, April 28, 2014

Natural Homemade Sunscreen Recipe


Natural Ways to Protect your Skin

While we normally suggest allowing your skin to get a good amount of sunshine to provide your body with ample Vitamin D, we do not condone soaking up the sun until you are burnt to a crisp. In years past, people knew how to avoid getting too much sun by following some simple sunny day guidelines:
  • avoid being outside during the middle of the day when the sun’s rays are the hottest
  • seek shade under a tree, umbrella, etc., if being outside during peak sun is necessary
  • wear a large-brimmed hat
  • wear light, loose clothing to cover exposed skin
However, we understand there are times you will not be able to cover up or get out of the sun and may need to use sunscreen. But commercial sunscreens have been a hot topic lately, guilty of containing harsh chemicals and being counterproductive in maintaining healthy skin.

So let’s learn how to safely protect your skin when covering up or getting out of the sun is out of the question.

Ingredients for Natural Sun Protection

There are several oils, butters, essential oils, and other natural ingredients that provide natural sun protection. While most of these offer very low amounts of sun protection, when added to your homemade sunscreen they nourish the skin and offer some protection against the effects of excessive sun.
  • Coconut oil - contains natural SPF properties
  • Shea butter - naturally protects skin, making it perfect for use in a sunscreen
  • Jojoba oil, sunflower oil, or sesame oil - these oils are easily absorbed into the skin and also provide some natural sun protection
  • Eucalyptus and lavender essential oils - eucalyptus has very low natural SPF and lavender is great for soothing and repairing skin. DO NOT use citrus essential oils in your sunscreen, as they may increase sensitivity to sunlight.
  • Vitamin E oil - nourishes and moisturizes skin, and helps naturally preserve homemade sunscreen
  • Zinc oxide (non nano) - a non-toxic, usually non-irritating, effective broad spectrum sunblock. The particles sit on the outermost layer of your skin, scattering and absorbing UVA and UVB rays, protecting the skin below. Be sure to use non nano zinc oxide to produce a natural homemade sunscreen. We purchased ours here. (The smallest amount you can purchase is a container that will last you years!)
Important: Nano or micronized zinc oxide has been treated to reduce the size of its particles, creating an ultrafine powder. When added to sunscreens it does not leave a white film on the skin, thus making it a popular choice in many commercial sunscreens. The problem with this is that the particles are so small they can enter the body through the skin, causing potential health problems. When purchasing, be sure to purchase a non nano zinc oxide that has particle sizes as large as possible. (Anything with a particle size smaller than 100nm is considered a nano particle – the zinc oxide we found is 330nm.)

Choose your SPF

Different amounts of zinc oxide are needed depending on what SPF you would like your lotion to be. Once you have chosen the SPF a little math is involved. The zinc oxide must be a certain percentage of the weight of your ingredients (before adding the zinc oxide). For this reason, it’s easiest to use a kitchen scale when making your sunscreen. For example, if you have 2 ounces of lotion and you’d like to make SPF 10 sunscreen, according to the values below you will need to add .2 ounces of zinc oxide to the lotion. Use the zinc oxide recommendations below.
  • For SPF 2-5: Use 5% zinc oxide
  • For SPF 6-11: Use 10% zinc oxide
  • For SPF 12-19: Use 15% zinc oxide
  • For SPF >20: Use 20% zinc oxide

Homemade Natural Sunscreen

Ingredients:

  • 1 oz. coconut oil
  • 0.8 oz. shea butter
  • 0.1 oz. jojoba, sesame, or sunflower oil
  • 0.1 oz. Vitamin E oil
  • 30 drops essential oils, optional – I use 15 lavender, 10 eucalyptus, 5 peppermint
  • zinc oxide powder (determine amount for 2 oz. of lotion)

Directions:

Add coconut oil, shea butter, and jojoba/sesame/sunflower oil to a makeshift double boiler. (To make your own double boiler, place a Pyrex measuring cup containing ingredients inside a small pot filled with a few inches of water). Heat gently until shea butter is just melted. Remove from double boiler and allow to cool a little. Put on a mask that covers your nose and mouth (to avoid breathing in the fine particles of zinc oxide powder), and measure out your zinc oxide. Add zinc oxide, Vitamin E oil, and optional essential oils to the other ingredients. Stir well to combine. Store in a dark jar in the refrigerator.

To Use:

Apply liberally to exposed skin. Reapply every few hours, or more often if swimming or sweating.

Additional Notes

This homemade sunscreen has about a 6 month shelf life, and should be refrigerated when not being used. The oils it contains are photosensitive, so do not leave your homemade sunscreen sitting out in direct sunlight. Keeping it in a cooler will prevent it from melting in high temperatures when taking it to the pool or beach.

If you prefer to add zinc oxide to another homemade lotion you like, simply weigh a desired amount of lotion and add enough zinc oxide to achieve the preferred SPF, mixing thoroughly.

Wednesday, April 9, 2014

10 Foods That A Nutritionist Always Has In Her Freezer

People often think that eating healthy takes way too much planning and preparation. Either they hate grocery shopping every week or don’t feel as though they have the time to do so. Luckily, the freezer can make your life much easier.

Here is a list of what nutritionist, Kristy Rao, always has in her freezer to ensure that she's eating healthy even when she doesn't have enough time to go to the farmers' market:

Frozen fruits and vegetables


This is key for always being prepared to make a smoothie, even when you haven't been to the grocery store in a while. One great thing about having frozen fruits and veggies on hand is that you often won't even be able to find the same organic fruits or vegetables unfrozen. I freeze ripe bananas myself and buy bags of raspberries, blueberries, strawberries, peaches, spinach and kale. In the summertime, I tend to have leftover watermelon, which I also freeze in chunks.

Ezekiel bread and muffins


Since I dont eat bread often, I keep it frozen. I take out a couple of slices or muffins at a time depending on how much I feel like having, so that the rest remains fresh. I choose Ezekiel bread because it's made with sprouted grains and beans and is fully organic. Although there's still gluten in this bread, it's still easier to digest than traditional bread.

Homemade popsicles


All you have to do is purchase BPA-free popsicle molds, blend up your favorite smoothie, and pour it into the mold to freeze. I recommend sweetening with honey or organic agave syrup.

Juice or coconut water ice cubes


I will fill my ice cube trays up with organic coconut water and freshly squeezed orange or apple juice to throw into my smoothies for sweetness. The orange cubes are also great to put into a glass of water for taste.

Organic, gluten-free waffles


I typically make my own and freeze for a rainy day, but you can also purchase these. They're one of my favorite treats for breakfast.

Oat and spelt flour


I never use white flour. These are great alternatives, and are best kept in the freezer to keep fresh.

Acai


I love making smoothies with unsweetened acai berry packs, and usually use half a pack for a smoothie.

Coconut ice cream


This is one of my favorite not-so-guilty pleasures, because you can get organic, non-dairy and low glycemic coconut ice cream. It's perfect for a treat that won't make you feel terrible!

Blue-green algae


I know it sounds scary, but blue-green algae is extremely good for you, and you won’t even taste it in your smoothie!

Dark chocolate


How could I possibly risk running out? I always buy an organic bar with 70% or more cacao content.


Monday, January 27, 2014

Prepackaged Meals that You Can Make Yourself


Prepackaged meals. we all try to avoid them, but actually may end up with a few in the cupboard. While they aren’t too pricy, a majority of the ingredient list is more than a little concerning. Hydrogenated this, hydrolyzed that. And the sodium content? Sheesh. Looking at the nutrition label of a popular boxed meal, and one serving of the stuff will give you 770mg of sodium. An adult’s daily intake is usually more than sufficient at 1,500mg—most of us don’t even need that much.

As always, we aim to provide you with recipes and meal idea made from locally sourced, organic ingredients, using what you already have in your pantry. In the long run, it's less expensive and the nourishment value is much higher than in prepackaged meals.  So, if you’re in search of a way to steer clear of putting your money towards meals that come in a box and don’t last very long, here are a few that you can make yourself.

Breadsticks

This recipe is referred to as “Breadsticks,” and while it does make amazing breadsticks, it can also be used to make pizza, calzones, dinner braids, or a quick loaf of bread. If you master this simple recipe, you will never have to buy one of trans fat tubes of dough again.

Preheat your oven to 375 degrees.

Combine 1 tablespoon yeast, 1 ½ cup warm water, ½ teaspoon sugar. Let them rise and set on top of your stove; it’s getting warm, which makes for an ideal place for the yeast to get going.

Once the yeast is bubbly, add 2 tablespoons sugar, ½ teaspoon salt, and about 3 cups of flour—or a little more if needed—just enough to make a nice, soft dough. (It shouldn’t be sticking to the bowl or your hands.)

Take your ball of dough out of your mixing bowl, grease the bowl, and put the dough back in. Cover the bowl with a damp towel, and place it back on the stove.

Let it rise for ten minutes.

Now, on a floured surface, roll the dough out until it’s about ½ inch thick. With a pizza cutter, cut into 4×2-inch strips. Dip the strips into melted butter, then place them on a baking sheet. Let them rise for 15 minutes, then bake them for 12-14 minutes.

Brownies

No need to buy a mix when you’ve got cocoa powder on hand. You can make several batches of brownies for the cost of one mix.

Mix together:
  • 1 cup softened butter
  • 2 cups sugar
  • 4 eggs
  • 2 teaspoons vanilla
After those are mixed well, add:
  • 1 ½ cup flour
  • ½ cup cocoa powder
  • ½ teaspoon salt
Pour the batter into a greased and floured 13×9 pan, and bake at 350 degrees for 30 minutes.

For a family of four, cutting the recipe in half is just about perfect; there’s enough for dinner and for a few leftovers for the next day, and you can save the rest of the ingredients for another batch later on.

Chicken Pasta Salad

Stir together:
  • 12 oz. package bowtie pasta, cooked
  • 12 oz. package rainbow pasta, cooked
  • 6 chicken breasts (cooked and shredded or cubed)
  • 1 can crushed pineapple, lightly drained
  • 2 cups celery, finely chopped
  • 2 cups red grapes, quartered
  • 1 cup mayonnaise
  • 1 bottle coleslaw dressing
This is just what the recipe calls for. It makes a lot, so it’s perfect for when you have to serve a lot of people. Salads like this are great because you're able to use whatever you have on had; apples instead of grapes, cucumbers instead of celery, canned chicken, more mayo if you don’t have dressing, etc. Don’t be afraid to break the rules.

Roasted Red Pepper Hummus

In a food processor, blend the following:
  • 1 can chickpeas
  • 2 heaping tablespoons tahini
  • Juice of one freshly squeezed lemon; or 2 tablespoons of the bottled kind
  • ½ teaspoons salt
  • 1 roasted red pepper (you can use a small jar of roasted red peppers)
  • 2 cloves of chopped garlic sauteed in 2 tablespoons of olive oil
Blend ingredients together for a few minutes, and serve with crackers, veggies, or use it as a sandwich spread.

Sidenote: while throwing everything into the blender makes a good hummus, mixing everything else – the tahini, lemon juice, salt, garlic, and oil — and then blending it in with the beans makes it even better.


Cheese and Broccoli Soup

In a large microwavable bowl, melt 6 tablespoons butter, then add 4 tablespoons flour and 2 teaspoons chicken bouillon; stir well.
Return to microwave for 1 minute, then whisk in 4 cups milk.
Return to microwave for 18 minutes or until thick; stop and stir every 4 minutes.
Add one jar of Cheez Wiz and stir until it melts into the soup.
Add 2 large bunches of chopped, cooked broccoli.

Wednesday, January 22, 2014

Nuts for Nutella? Learn How to Make Your Own


We know, it’s a dilemma. Nutella is so good … and yet so not local: It takes at least six countries to make a jar of the stuff. Luckily you don’t have to choose your gut over your guilt complex when it comes to this homemade treat, since it doesn’t get much more local than your own kitchen (assuming your chocolate and hazelnuts are fair-trade).

Carey Nershi of Reclaiming Provincial is making a version that’s a slightly grown-up version of the one you may be familiar with. It’s nutty and not too sweet, with equal parts milk and dark chocolate and the teensiest hint of almond. If you’d like to keep it dairy-free, you can substitute coconut oil and condensed almond milk.

All in all, it’s a great (and dare I say far superior) alternative to the store-bought variety.


Homemade Nutella

Makes about 2 cups

To roast and peel the hazelnuts:
  • 1 1/4 cups hazelnuts
  • 2 cups water
  • 3 tablespoons baking soda

To make the Nutella:
  • 1 1/4 cups hazelnuts, roasted and peeled
  • 5 ounces milk chocolate, chopped
  • 5 ounces dark chocolate, chopped
  • 6 tablespoons heavy cream
  • 1 tablespoon butter, softened
  • 1 tablespoon unsweetened cocoa powder
  • 2 tablespoons confectionery sugar
  • 1/2 teaspoon salt
  • 1/2 teaspoon vanilla extract
  • 1/8 teaspoon almond extract


Preheat the oven to 350 degrees F. Spread the hazelnuts out on a baking sheet and roast for 15 minutes, stirring every five minutes.

When hazelnuts have finished roasting, bring 2 cups of water to a boil in a large pot. Prepare a separate bowl of cool water and set aside on the counter. Once the water on the stovetop is boiling, add 3 tablespoons of baking soda, followed by the hazelnuts. Boil for three minutes, drain, then add the hazelnuts to the bowl of cool water. Peel hazelnuts and discard skins.


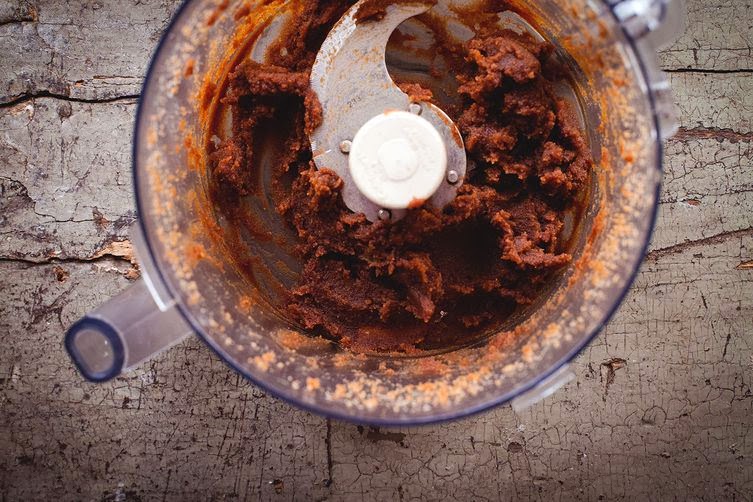
Blend hazelnuts in a food processor or blender until they form a thick, smooth paste. This should take approximately five minutes. It will be crumbly at first but the crumbs will begin to come together to form a butter.


Add the butter, sugar, cocoa powder, salt, and extracts. Continue to blend until smooth, approximately one to two minutes.


Melt together the chocolates and heavy cream in a double boiler, stirring until a smooth ganache forms. Remove from heat and let cool for five minutes.


Once ganache has cooled slightly, add it to the food processor or blender and blend until just combined (around 15 seconds).

Transfer to jars and store in the fridge for up to a week. (The Nutella will firm up slightly in the fridge, so let it sit out at room temperature for approximately 30 minutes to soften the consistency).

Monday, December 23, 2013

Salt Dough Ornaments


Working with salt dough is a fun and very inexpensive way to make some personalized heirloom ornaments this year. There is something so special about handmade ornaments. They give your home a personal feel and create lifelong memories for you and your children. They also make great gifts for friends and loved ones.

Making these heirloom holiday decorations is easier than you think. With this simple recipe you’ll have adorable, handmade (not to mention, non-toxic and eco-friendly) ornaments to show off to your friends and family.

What you'll need:
  • 4 cups organic, all-purpose flour
  • 1 cup fine sea salt
  • 1-1 1/2 cup warm water
  • Assorted cookie cutters
  • Paint, glitter or embellishments of choice
  • Ribbon (for hanging)


Instructions:
  1. Mix the flour and salt together well. Incorporate water a little bit at a time until you have a firm ball of dough. If the dough is too sticky, add small amounts of flour until the desired consistency is reached.
  2. Roll dough to 1/8-inch thickness. Use cookie cutters to cut shapes. Make a small hole near the top for hanging. Carve in designs or features with a toothpick. Lift shape carefully when transferring to baking sheet.
  3. Bake on parchment lined baking sheet at 325º for 20 to 30 minutes or until completely hardened.
  4. Allow to cool, then decorate with paints, fabric scraps, ribbon, etc. or leave them to their natural beauty. Hang with ribbon or hooks anywhere you feel needs a little holiday cheer.
[via Vitacost]

Friday, November 8, 2013

Homemade Cough Syrup

Herbal cough syrup is a natural homemade alternative to conventional cough syrup. It contains herbs that help soothe the throat and promote restful sleep.

Herbal Cough Syrup Recipe

Prep time: 5 mins
Cook time: 30 mins
Total time: 35 mins
Serves: 8+

Ingredients:

  • 1 quart of filtered water
  • ¼ cup Ginger Root (fresh grated or dried)
  • ¼ cup Chamomile Flowers
  • ¼ cup Marshmallow Root
  • 1 tablespoon Cinnamon
  • ¼ cup lemon juice
  • 1 cup honey

Instructions:

  1. Pour the water into a medium saucepan and add the dried herbs.
  2. Bring to a boil and then reduce to a simmer.
  3. Simmer until the volume is reduced by about half. (You will need 1 cup of liquid after herbs are strained off)
  4. Pour through a fine mesh strainer or cheesecloth to remove herbs (compost the herbs!).
  5. While liquid is still warm (not boiling) mix with lemon juice and honey and stir well.
  6. Store in airtight container in the fridge for up to 2 months.

Notes:

Recommended dosage is 1 teaspoon to children and 1 tablespoon to adults as needed for symptoms.

Monday, April 29, 2013

Green Cleaning Recipes


After a long winter, it's time for spring-cleaning. Unfortunately, the ever-expanding arsenal of home cleaning products now includes several dangerous weapons, loaded with strong, artificial colors and fragrances and harsh cleansing agents like bleach, ammonia and acids. These chemicals can produce indoor air pollution by off-gassing toxic fumes that can irritate eyes and lungs. (Children and pets are most at risk.) Many cleaners also contain unnecessary antibacterial agents (pesticides, technically), that can actually make bacteria stronger, and more resistant to antibacterial drugs.

And commercial cleansers cost a lot. So make your own! Even the biggest messes and toughest stains can be attacked effectively with baking soda, borax, lemon juice and other simple ingredients.

PORCELAIN AND TILE

Keep your bathrooms and kitchen tile spotless and hygienic with these natural cleansers:

Baking Soda and Water: Dust surfaces with baking soda, then scrub with a moist sponge or cloth. If you have tougher grime, sprinkle on some kosher salt, and work up some elbow grease.
Lemon Juice or Vinegar: Got stains, mildew or grease streaks? Spray or douse with lemon juice or vinegar. Let sit a few minutes, then scrub with a stiff brush.
Disinfectant: Instead of bleach, make your own disinfectant by mixing 2 cups of water, 3 tablespoons of liquid soap and 20 to 30 drops of tea tree oil. It's easy!

KITCHEN COUNTERS

The room where food is prepared, stored and often enjoyed requires constant vigilance. Splatters, spills and errant crumbs can build up and collect out of sight, encouraging harmful bacteria.

Baking Soda and Water: Reclaim counters by sprinkling with baking soda, then scrubbing with a damp cloth or sponge. If you have stains, knead the baking soda and water into a paste and let set for a while before you remove. This method also works great for stainless steel sinks, cutting boards, containers, refrigerators, oven tops and more.
Kosher Salt and Water: If you need a tougher abrasive sprinkle on kosher salt, and scrub with a wet cloth or sponge.
Natural Disinfectant: To knock out germs without strong products, mix 2 cups of water, 3 tablespoons of liquid soap and 20 to 30 drops of tea tree oil. Spray or rub on countertops and other kitchen surfaces.

WINDOWS AND MIRRORS

Instead of those harsh-smelling sprays, try this highly effective, simple solution for windows and mirrors:

White Vinegar, Water and Newspaper: Mix 2 tablespoons of white vinegar with a gallon of water, and dispense into a used spray bottle. Squirt on, then scrub with newspaper, not paper towels, which cause streaking.
If you're out of vinegar or don't like its smell, you can substitute undiluted lemon juice or club soda.

CARPET AND RUGS

Keeping carpets clean is less daunting than you might think, even after a season of tracked-in dirt and salt.

Beat Those Rugs: Take any removable rugs outside and beat the dust and hair out with a broom.
Club Soda: You've probably heard the old adage that club soda works well on carpet stains. But you have to attack the mess right away. Lift off any solids, then liberally pour on club soda. Blot with an old rag. The soda's carbonation brings the spill to the surface, and the salts in the soda thwart staining.
Cornmeal: For big spills, dump cornmeal on the mess, wait 5 to 15 minutes, and vacuum up the gunk.
Spot Cleaner: Make your own by mixing: 1/4 cup liquid soap or detergent in a blender, with 1/3 cup water. Mix until foamy. Spray on, then rinse with vinegar.
To Deodorize: Sprinkle baking soda or cornstarch on the carpet or rug, using about 1 cup per medium-sized room. Vacuum after 30 minutes.

WOOD FLOORS

Hardwood floors are beautiful, hygienic, long lasting and add value to your home. They are easy to vacuum, but don't do well with wet mopping. So how do you restore their natural glow without roughing them up?

Vinegar: Whip up a solution of 1/4 cup white vinegar and 30 ounces of warm water. Put in a recycled spray bottle, then spray on a cotton rag or towel until lightly damp. Then mop your floors, scrubbing away any grime.

SAFER OVEN CLEANING

Conventional oven cleaning chemicals are loaded with toxic ingredients, including ethers, ethylene glycol, lye (sodium and potassium hydroxide), methylene chloride and petroleum distillates. The products are harmful to skin and eyes, and the fumes are unhealthy. Instead, go natural!

Baking Soda and Water: Coat the inside of your dirty appliance with a paste made from water and baking soda. Let stand overnight. Then, don gloves and scour off that grime. Make spotless with a moist cloth.

CLOGGED DRAINS

A stopped up sink or tub is a real hassle, but pouring toxic chemicals like Drano on them isn't so wise. Not only will that pollute our waterways, but the products can cause chemical burns and are highly dangerous if ingested. Do you really want that in your home?

Baking Soda and Boiling Water: Pour 1/2 cup of baking soda into the problem drain, followed by 2 cups of boiling water. If that isn't doing it for you, chase the baking soda with a 1/2 cup of vinegar and cover tightly, allowing the vigorous fizzing of the chemical reaction to break up the gunk. Then flush that with one gallon of boiling water.

ANTIQUE LINENS

Whether you have fine family heirloom pieces or something with character you picked up at an estate sale for a song, you're eventually going to have to wash your antique linens. Even with advanced settings on today's washing machines, you still may want to address fragile fabrics by hand.

Sunlight: What could be easier than sanitizing and removing stains... with sunlight! (Just don't do it too often with fragile pieces, because they can start to break down). Simply lay your old lace, curtains and other fine linens on the grass in the sun for a few hours. Dirtier pieces can be dampened first.
Boiling: If that doesn't do the trick, fill a pot with water and bring to a boil on your stovetop. Drop in linens and let steep until stains lift.
Detergent and Borax: Mix dishwasher detergent and borax together until you get a thick rubbing paste. Rub into soiled linens, then rinse clean.
Peroxide: If you have stubborn stains, try spraying them with peroxide, then rinsing with water.


SILVERWARE

Commercial silver polish contains toxins, and manufacturers recommend you don't leave on skin too long. Do you really want something like that spread over your flatware?

Silver
Aluminum Foil, Boiling Water, Baking Soda and Salt: Keep your sterling shined with this seemingly magic method. Line your sink or a bucket with aluminum foil, and drop in tarnished silver. Pour in boiling water, a cup of baking soda and a dash of salt. Let sit for a few minutes. The tarnish will transfer from the silver to the foil.
Toothpaste: If you can't immerse your items or are otherwise inclined to polish by hand, rub tarnished silver with toothpaste and a soft cloth. Rinse with warm water and dry. Instead of toothpaste you can substitute a concoction made of 3 parts baking soda to 1 part water.
Copper
Ketchup: To keep your copper pots, pans and accents looking bright and shiny, try rubbing with ketchup.