Wednesday, April 30, 2014

GMO, yeah? 5 surprises from an otherwise boring look at genetically modified crops


Researchers at the USDA’s Economic Research Service have stepped back to look at the effect of genetically engineered crops since they were introduced in the U.S. It’s a pretty dry and unsurprising document, but when read carefully a few interesting things jump out. Here’s five.

1. How many GMO trials are there? Tons

There have been thousands and thousands a field trials, which have translated to just a handful of different traits. A lot of these must have been for different, locally adapted varieties of, say, insect resistance. But it was also interesting to see how many trials there were for the low-profile GMOs. There were tests of plants with disease resistance, and plants with “resistance to cold, drought, frost, salinity, more efficient use of nitrogen, increased yield.” In addition to the big three (corn, cotton, and soy), the USDA has approved 11 kinds of tomatoes, eight forms of canola, five potatoes, sugarbeets, papaya, rice, squash, alfalfa, plum, rose, tobacco, flax, and chicory. About 12 percent of the squash grown in the U.S. is genetically engineered for disease resistance.

http://grist.files.wordpress.com/2014/02/one.png?

2. Herbicide tolerance is sneaky

Herbicide-tolerant soybeans grow on more than 90 percent of the soy acres in the U.S. But there doesn’t seem to be a direct benefit to farmers in terms of significantly higher yields. So why pay more for the GMO seed? Here’s what the researchers say:
The fact that several researchers found no significant differences between the net returns of adopters and nonadopters of HT crops (particularly HT soybeans) despite the rapid adoption of these crops suggests that many adopters may derive nonmonetary benefits from HT adoption. In particular, weed control for HT soybeans may be simpler, freeing up management time for leisure, enterprise growth, or off-farm income-generating activities.
In addition, farmers pay less for specialized herbicides and for the diesel needed to run a weed-busting cultivator.

3. Insecticide use is way down

That’s among both farmers who used GE insect-resistant crops and those who didn’t. “Corn insecticide use by both GE seed adopters and nonadopters has decreased — only 9 percent of all U.S. corn farmers used insecticides* in 2010. Insecticide use on corn farms declined from 0.21 pound per planted acre in 1995 to 0.02 pound in 2010.”

Wow. That’s a success story you don’t normally hear.

http://grist.files.wordpress.com/2014/02/two.png?w=940&h=630

4. Traditional GMOs are increasingly monolithic

I’ve argued that we shouldn’t fight over “GMOs” but instead talk about the specific plants we like or dislike. There may be a problem with that argument: Now the main GE traits are coming bundled together. The argument, I think, still stands for rare cases (like disease resistance and Golden Rice).

5. Plowless farmers rise up

More and more farmers are growing crops with only minimal disturbance of the soil. That conserves topsoil, prevents run-off pollution, and allows for carbon capture in the fields. It’s good news, and it’s largely associated with the use of herbicide-tolerant crops (though I’m still not totally convinced the relationship is causal).

Here’s the entire doc for those who wish to dig deeper. Don’t say we didn’t warn you.

*This is the percentage of farmers who applied insecticide to their fields. It doesn’t include the farmers that used insecticides just by planting seeds: Many seeds are coated with an insecticide, which the plant sucks up and uses to fend off bugs. These systemic insecticides may cause less collateral damage because they aren’t sprayed over the entire field, but there are suggestions that they may hurt pollinators.

[via

Monday, April 28, 2014

10 Apps to Help You Eat GMO Free


As the struggle for GMO labeling rages on, app developers are taking matters into their own hands. By creating apps that allow consumers to determine exactly what is in the products that they buy, these developers are giving you total freedom of choice. These apps all have multiple features for identifying different types of ingredients, which means installing a combination of apps will keep you better informed. These ten apps all identify GMO products, among other ingredients, so you can control exactly what you choose to have in your diet.
  • Non-GMO Project Shopping Guide – As it says on the can, this app provides consumers with a guide to shopping non-GMO. The Non-GMO Project’s Product Verification Program is a collaboration of a number of corporations whose aim is to help consumers make more informed choices in their purchases. The guide is completely free and is periodically updated with new contributions.
  • Healthy Food, Allergens, GMOs & Nutrition Scanner – This Nutrition Scanner costs $3.99 and allows you to quickly determine exactly what is in the food you are shopping for. The scanner reads food labels and returns information on nutrition, ingredients additives and whether the product contains any GMOs. You don’t need to wonder which ingredients are dangerous, either, as the app has a caution rating for potentially undesirable contents.
  • Buycott – If you are passionate about supporting companies that you believe have ethical practices, Buycott will help you stick to your principles. The app can trace food items back through the production chain, keeping you informed of every company involved in bringing the item to the supermarket shelf. The free app also provides contact details for each company, so you can voice your concerns or support for any given product.
  • True Food – For conscientious consumers, True Food provides a real-time guide to shopping non-GMO. Every day the app will update with new alerts, news and tips on how to avoid GMO products, and where to find suitable alternatives. With over 70% of food products in the U.S. containing GMOs, this free app is definitely worth installing on your iPhone.
  • ShopNoGMO – With 23 food categories that contain no GMOs, this free app gives you the power to decide which products you want to feed your family. The app is not limited to when you shop, however, as there is also a useful feature to help you avoid GMOs when dining out. Besides information on GMOs, there are helpful tips on sourcing organic foods and identifying other potentially unhealthy ingredients.
  • GMO Checker – You can use this app to quickly identify products that are organic, vegan, gluten free and GMO free. GMO Checker uses a simple search function, which returns results with a color-coded key that tells you whether the product contains ingredients from the category list. While the app has a simple interface, it does cost $3.99, so it is not the cheapest option on the market.
  • ipiit, The Food Ambassador – ipiit is a completely collaborative app with a database that is constantly growing due, in part, to user contributions. The database contains over 210,000 food products, with information on Gluten, Lactose, HFCS, GMO and much more. Users can set up their own preferences, making it easier to find the foods that match your needs. Rating foods on this free app will help keep the community informed so everyone can share in promoting healthier food choices.
  • Chemical Maze – Whether you are concerned about what’s in your food, cosmetics or pet products, Chemical Maze will help keep you informed. You can filter results by category, effects, origin or symptoms, depending on what you want to find out about a product. This is the free addition of the app, however, there is also a paid edition with added features.
  • Barcode and PLU Label Reader – Although this app is a Barcode and PLU reader, you have to manually enter the codes. With that said, the app does provide a lot of useful information that will help you purchase the healthiest products and avoid GMOs. Barcode and PLU Label Reader costs $1.99 and has a 4+ user rating on the iTunes store.
  • Fruit Checker – A PLU label reader for fruits and vegetables, Fruit Checker will confirm whether products are certified organic, conventionally grown or genetically modified. In some cases the app will tell you where the product was grown, too. The app is useful, but limited for the price-tag of $0.99.

Natural Homemade Sunscreen Recipe


Natural Ways to Protect your Skin

While we normally suggest allowing your skin to get a good amount of sunshine to provide your body with ample Vitamin D, we do not condone soaking up the sun until you are burnt to a crisp. In years past, people knew how to avoid getting too much sun by following some simple sunny day guidelines:
  • avoid being outside during the middle of the day when the sun’s rays are the hottest
  • seek shade under a tree, umbrella, etc., if being outside during peak sun is necessary
  • wear a large-brimmed hat
  • wear light, loose clothing to cover exposed skin
However, we understand there are times you will not be able to cover up or get out of the sun and may need to use sunscreen. But commercial sunscreens have been a hot topic lately, guilty of containing harsh chemicals and being counterproductive in maintaining healthy skin.

So let’s learn how to safely protect your skin when covering up or getting out of the sun is out of the question.

Ingredients for Natural Sun Protection

There are several oils, butters, essential oils, and other natural ingredients that provide natural sun protection. While most of these offer very low amounts of sun protection, when added to your homemade sunscreen they nourish the skin and offer some protection against the effects of excessive sun.
  • Coconut oil - contains natural SPF properties
  • Shea butter - naturally protects skin, making it perfect for use in a sunscreen
  • Jojoba oil, sunflower oil, or sesame oil - these oils are easily absorbed into the skin and also provide some natural sun protection
  • Eucalyptus and lavender essential oils - eucalyptus has very low natural SPF and lavender is great for soothing and repairing skin. DO NOT use citrus essential oils in your sunscreen, as they may increase sensitivity to sunlight.
  • Vitamin E oil - nourishes and moisturizes skin, and helps naturally preserve homemade sunscreen
  • Zinc oxide (non nano) - a non-toxic, usually non-irritating, effective broad spectrum sunblock. The particles sit on the outermost layer of your skin, scattering and absorbing UVA and UVB rays, protecting the skin below. Be sure to use non nano zinc oxide to produce a natural homemade sunscreen. We purchased ours here. (The smallest amount you can purchase is a container that will last you years!)
Important: Nano or micronized zinc oxide has been treated to reduce the size of its particles, creating an ultrafine powder. When added to sunscreens it does not leave a white film on the skin, thus making it a popular choice in many commercial sunscreens. The problem with this is that the particles are so small they can enter the body through the skin, causing potential health problems. When purchasing, be sure to purchase a non nano zinc oxide that has particle sizes as large as possible. (Anything with a particle size smaller than 100nm is considered a nano particle – the zinc oxide we found is 330nm.)

Choose your SPF

Different amounts of zinc oxide are needed depending on what SPF you would like your lotion to be. Once you have chosen the SPF a little math is involved. The zinc oxide must be a certain percentage of the weight of your ingredients (before adding the zinc oxide). For this reason, it’s easiest to use a kitchen scale when making your sunscreen. For example, if you have 2 ounces of lotion and you’d like to make SPF 10 sunscreen, according to the values below you will need to add .2 ounces of zinc oxide to the lotion. Use the zinc oxide recommendations below.
  • For SPF 2-5: Use 5% zinc oxide
  • For SPF 6-11: Use 10% zinc oxide
  • For SPF 12-19: Use 15% zinc oxide
  • For SPF >20: Use 20% zinc oxide

Homemade Natural Sunscreen

Ingredients:

  • 1 oz. coconut oil
  • 0.8 oz. shea butter
  • 0.1 oz. jojoba, sesame, or sunflower oil
  • 0.1 oz. Vitamin E oil
  • 30 drops essential oils, optional – I use 15 lavender, 10 eucalyptus, 5 peppermint
  • zinc oxide powder (determine amount for 2 oz. of lotion)

Directions:

Add coconut oil, shea butter, and jojoba/sesame/sunflower oil to a makeshift double boiler. (To make your own double boiler, place a Pyrex measuring cup containing ingredients inside a small pot filled with a few inches of water). Heat gently until shea butter is just melted. Remove from double boiler and allow to cool a little. Put on a mask that covers your nose and mouth (to avoid breathing in the fine particles of zinc oxide powder), and measure out your zinc oxide. Add zinc oxide, Vitamin E oil, and optional essential oils to the other ingredients. Stir well to combine. Store in a dark jar in the refrigerator.

To Use:

Apply liberally to exposed skin. Reapply every few hours, or more often if swimming or sweating.

Additional Notes

This homemade sunscreen has about a 6 month shelf life, and should be refrigerated when not being used. The oils it contains are photosensitive, so do not leave your homemade sunscreen sitting out in direct sunlight. Keeping it in a cooler will prevent it from melting in high temperatures when taking it to the pool or beach.

If you prefer to add zinc oxide to another homemade lotion you like, simply weigh a desired amount of lotion and add enough zinc oxide to achieve the preferred SPF, mixing thoroughly.

Thursday, April 24, 2014

8 Gluten-Free Recipes You Need to Know Now


Going gluten-free can really hit hard. But chin up: There's absolutely nothing that they can make with gluten which we can't make without. These eight gluten-free recipes are the ones you want to master so that you really just won't feel the pinch of that missing gluten -- and you won't be tempted to cheat on your gluten-free diet.

With them, you'll pack those school lunches without a problem, wrap up a burrito for a quick dinner, serve the proper side with your famous chili (cornbread!), make gravy or cheese sauce for macaroni and cheese, bake for the bake sale, and even satisfy that gummy-loving sweet tooth. Nothing is out of reach!

1. Gluten-Free Flour Tortillas: The best thing about these flour tortillas is just how authentic they taste. The second best thing? They freeze beautifully. Just let them cool, then wrap them in a stack (no need to place any parchment in between the tortillas--just stack 'em up) in freezer-safe wrap, and place them in the freezer. Defrost them overnight in the refrigerator, or even in a quick spin in the microwave. I always have at least a dozen in my freezer. I consider it dinner insurance.


2. Old Fashioned Gluten-Free Cornbread: If flour tortillas are always in freezer, this easy all-cornmeal, no-flour skillet cornbread is always at the top of my mind. It is a super-easy recipe to throw together, and bakes in about 20 minutes. It's the perfect accompaniment to that tried and true naturally gluten-free chili recipe your family loves, and I've even served it for breakfast, drizzled with a bit of honey.

3. The Best Gluten-Free Wonton Wrappers: Unlike conventional wonton wrappers which are sold ready-made in large grocery stores in the refrigerated case, if we want gluten-free wonton wrappers, we have to make them ourselves. And since wonton wrappers are the foundation of everything from eggrolls and crab rangoon to steamed dumplings and wonton soup, this is a gluten-free recipe to master right now. Like the gluten-free flour tortillas above, they freeze beautifully, stacked without filling, or filled and shaped. You can even boil filled wontons in soup without defrosting them at all!

4. Basic Gluten-Free Flour Roux:
A flour roux is really one of the simplest ways to thicken everything from soups and sauces to cheese sauce and gravy. But have you ever tried to make a gluten-free flour roux with a gluten-free flour blend that contains xanthan gum or guar gum? Not a good scene. Master this recipe for a basic gluten-free flour roux, and you can even follow a conventional recipe the rest of the way.

5. Gluten-Free Chocolate Chip Yogurt Quick Bread: Quick breads are nothing more than baked goods that are leavened with chemical leaveners (such as baking powder and baking soda), instead of yeast. So, all muffins are quick breads. So are most cakes and cookies. But not every muffin recipe will work well in a loaf pan. This recipe for a tender gluten-free yogurt quick bread, made here with miniature chocolate chips (but you could use any dry mix-in piece you like), is a wonderful basic quick bread loaf recipe to have in your back pocket.

6. Soft Batch Gluten-Free Chocolate Chip Cookies: Whenever someone new to gluten-free eating, who is a bit spooked and afraid to bake, asks me what they should bake first, I always say "drop cookies." No rolling out cut-out cookie dough when you're right starting out. Just drop cookies, which you "drop" by the tablespoon on a baking sheet and bake away. These gluten-free chocolate chip cookies are rolled into big, round balls of dough, and they bake into a thick, pillow-soft cookie that tastes like it just came out of the oven, even once it's cooled.

7. Gluten-Free English Muffin Bread: Did someone say lunch? This is the easiest, softest, and fastest gluten-free yeast bread, and it is absolutely perfect for those school lunches. There is no shaping involved in making English Muffin bread, as it's a very, very soft dough. No learning curve!

8. Gluten-Free Red Cherry Licorice:
Finally, gluten-free licorice. Read the package on most licorice, and one of the very first ingredients is wheat flour. It's just one of those things that most people just don't realize isn't naturally gluten-free. It's candy! It should be safe, right? Well, break out those candy thermometers. This is a fast and easy recipe, and it's one to master early on because you will feel like a total gluten-free rockstar when you pull it off.

Wednesday, April 23, 2014

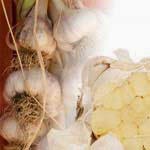
Growing garlic—what’s the difference between softneck garlic and hardneck garlic varieties?

Growing garlic in your own garden lets you play with flavors you cannot find at stores. We carry more organic seed garlic than any other garden company, at the best prices, so plunge in and get garlicky.

How to grow garlic

The nuts and bolts of growing and harvesting garlic are right here for you, in the Grow Organic How to Grow Garlic video and their downloadable Garlic Growing Guide.

The question is, which varieties of garlic seed do you want to plant? Softneck or hardneck or both?

Garlic has a neck?

By the time you see garlic in the store it has been trimmed, but there is still a papery tuft that stands above the bulb. That’s the covering of the “neck” of the garlic.

Garlic also comes with different colored skins around the cloves. The cloves themselves are always a creamy white.

Softneck Garlic

This is the garlic you’ll find in most grocery stores. The bulb has a mild flavor. A great virtue of the softneck garlic (Allium sativum ssp. sativum) is that it stores very well. Since the necks are (literally) soft, you can cut them nice and long for braiding. A braid of garlic makes a winning kitchen gift for friends and family!

Which to choose? California Early White has no hot bite in its flavor, grows rapidly and is ready to harvest early. If making garlic braids is your top priority, plant California Late White. You’ll get a stronger flavor with this garlic, and it does better in warm climates than the Early variety.

Hardneck Garlic


Hardnecks (Allium sativum ssp. ophioscorodon) are closer to wild garlic, with complex flavors. These are the garlics that some compare to wines with subtle differences that reflect the regional soil and weather patterns. One simple benefit to the cook is the way some of their skins slip off smoothly. Hardnecks do not store as long as softnecks—cure them, eat them within 6-10 months, and get to know their distinctive flavors. Spanish Roja’s flavor in particular is rich and classic—it does have a shorter shelf life, of 3-4 months, so go ahead and enjoy this best seller early.

Elephant Garlic

This big guy is technically in the leek family, but you’d never know by the look or the taste. Kids love harvesting this giant of the garlic patch, and it keeps well too, with a mild flavor.


Storing Garlic

Garlic keeps best at 32-40 degrees with a relative humidity of 60-70. If you need help keeping tabs on the temperature and humidity in your storage area, try the Humiguide Thermometer or Digital Indoor/Outdoor Thermometer.

Garlic Combo Pack

Still can’t decide? That’s why Grow Organic created a Garlic Combo Pack, to let you try a little of this and a little of that—at a bargain price! It’s a gastronomical delight featuring organic California Early White softnecks, organic Russian Red and organic Purple Italian hardnecks, a conventional Elephant garlic, and even some organic French Red Shallots for delicate flavors.

A Garlic Book

Ron Engeland’s popular book, Growing Great Garlic is the ultimate guide for the organic garlic grower; in addition to practical advice, you’ll learn more about garlic in the Hanging Gardens of Babylon.

For more information on garlic watch our videos on Growing Garlic and Garden Planning & Crop Rotation. Get the scoop on Music, their most popular of the hardneck garlics. Learn how to grow garlic and its allium cousins with their article on What to Plant in Your Winter Garden.

Welcome to the World of Seed Garlic!

Plant some garlic this year, keep track of what you like, and experiment with new varieties in the years ahead. Once you start growing garlic at home you’ll be spoiled by having your own cured garlic to cook with, in such a range of flavors.

6 Amazing Vegan Brunch Recipes

Quinoa Porridge

Serves: 1

Ingredients:
   1 cup unsweetened almond milk
   1/3 cup quinoa flakes
   1 tablespoon vanilla extract
   1/4 teaspoon cinnamon
   1/4 teaspoon ginger
   1/8 teaspoon nutmeg
   3 to 4 dried prunes, chopped (or other dried fruit)
   1 tablespoon maple syrup
   1 tablespoon raw sliced almonds

Directions:
Bring almond milk to a boil in a pot over high heat. Add quinoa flakes, return to a boil, and cook for 30 seconds, stirring frequently. Add vanilla, cinnamon, ginger, nutmeg, and prunes and cook another 30 seconds, continuing to stir. Remove from heat and allow to cool. Add maple syrup, mix well, and sprinkle with almonds.

Pumpkin Pancakes with Maple Tofu Whip

Serves: 2 to 4

Ingredients:
Maple Tofu Whip:
   1 (12.3-ounce) package non-GMO firm tofu
   1/4 cup maple syrup
Pancakes:
   1 cup spelt flour
   1 tablespoon flaxseed meal
   2 teaspoons baking soda
   1 teaspoon pumpkin pie spice
   1/3 cup organic pumpkin purée (canned is fine)
   1 tablespoon maple syrup
   1 tablespoon vanilla
   1 cup almond milk

Directions:
1. Drain tofu by placing it between two plates and setting a heavy pot cover on top of the top plate. Let sit for an hour, then blend tofu and maple syrup in a blender for about 30 seconds, until completely smooth.
2. Blend all pancake ingredients in a blender. Heat a nonstick skillet over medium-high heat and ladle in batter by the quarter cup. Cook until bubbles appear, then flip using a spatula, even out (or thin out) pancakes with the spatula, and cook for two to three more minutes.
3. Top warm pancakes with tofu whip.

Sweet Potato Tempeh Hash

Serves: 2

Ingredients:

   2 sweet potatoes, cubed
   2 tablespoons chopped onion
   1 clove garlic, minced
   1 tablespoon olive oil
   1/2 cup julienned red bell pepper
   6 ounces tempeh, cubed
   1 cup vegetable broth
   1 teaspoon paprika
   1 tablespoon soy sauce
   Salt and pepper, to taste
   2 tablespoons chopped fresh parsley

Directions:
1. Heat the oven to 350 degrees. Place sweet potato in a lightly oiled or nonstick pan and bake for 20 minutes. Remove from the oven and set aside.
2. In a wok over medium-high heat, sauté onion and garlic in oil for 2 to 3 minutes. Add pepper, tempeh, and a bit of broth and stir frequently for 2 minutes. (Keep broth handy and always have 1/2 to 1 centimeter of broth at the bottom of the wok.) Add sweet potatoes and paprika, and slowly add remaining broth until it has all been absorbed by the tempeh and potatoes. Then add soy sauce, salt, pepper, and parsley. Mix well and serve.

Carrot Muffins with Maple Cream Cheese


Serves: 6 to 12

Ingredients:
Muffins:
   2 tablespoons flaxseed meal
   6 tablespoons water
   1 cup sugar
   1/2 cup unsweetened applesauce
   1 cup flour
   1 teaspoon baking soda
   1/2 teaspoon cinnamon
   1/2 teaspoon ginger
   1/4 teaspoon salt
   2 cups shredded carrots
   1/2 cup chopped pecans, optional
   1/2 cup raisins, optional
Maple Cream Cheese:
   1 (8-ounce) package vegan cream cheese, cold
   1/4 cup vegan margarine, cold
   1/4 cup maple syrup
   1 teaspoon vanilla extract

Directions:
1. Preheat the oven to 400 degrees and line a cupcake tin with wrappers or oil the tin well.
2. Mix flaxseed and water well, then beat with sugar and applesauce in a large bowl with an electric mixer until well combined. Add flour, baking soda, cinnamon, ginger, and salt and beat. When well blended, stir in carrots and, if desired, pecans and raisins.
3. Spoon batter into cupcake tin and bake for 25 to 30 minutes, until golden brown on the edges. Remove from the oven and let cool on a rack for 15 minutes. Remove muffins from the tin and let cool on rack completely.
4. Beat cream cheese and margarine in a large bowl until smooth. Add maple syrup and vanilla and beat again until smooth. If spread isn’t sweet enough for your liking, add up to 1/2 cup sweetener of choice and beat until smooth. Refrigerate for 1 hour.
5. Serve muffins with cream cheese spread on the side.

Tofu Scramble

Serves: 2

Ingredients:
   1 (12.3 ounce) package non-GMO firm tofu
   1 clove garlic, minced
   1/3 cup chopped onions
   1 cup chopped broccoli
   1/2 cup chopped red bell pepper
   2 tablespoons nutritional yeast
   1 teaspoon paprika
   1 teaspoon ground saffron
   1/2 teaspoon ground cumin
   Salt and pepper, to taste
   1 cup shredded kale (stems removed)

Directions:
1. Drain tofu by placing it between two plates and placing a heavy pot cover on top of the top plate. Let sit for at least an hour.
2. In a nonstick pan over medium heat, lightly brown garlic and onion, stirring frequently. Crumble tofu into pan and add remaining ingredients except kale. Stir frequently, until tofu reaches desired color, about 3 minutes. (If mixture becomes too dry at any point, add water 1 tablespoon at a time.) Reduce heat to low, add kale, and stir for 1 more minute. Serve with vegan toast and tempeh bacon, if desired.

Banana French Toast with Chocolate Macadamia Nut Butter


Serves: 2

Ingredients:
Chocolate Macadamia Nut Butter:
   6 tablespoons vegan dark chocolate chips
   4 tablespoons macadamia nut butter (or other nut butter)
   1/4 cup unsweetened almond milk
   1 tablespoon vanilla extract
French Toast:
   1 banana
   1/3 cup unsweetened almond milk
   1 tablespoon maple syrup
   1/2 teaspoon cinnamon
   1 teaspoon vanilla extract
   4 slices vegan bread
   1 tablespoon vegan margarine
   Fresh fruit, optional
   Chopped nuts, optional

Directions:
1. Place all nut butter ingredients in the top of a double boiler and stir until melted and mixed well. (If you don’t have a double boiler, place a stainless-steel bowl on top of a pot of boiling water so that the bowl rests in the water but doesn’t touch the bottom of the pot, and melt the ingredients in the bowl.) Let mixture cool in the refrigerator for at least an hour.
2. Blend banana, almond milk, maple syrup, cinnamon, and vanilla in a blender and pour mixture into a shallow plate. Soak bread in mixture for 1 minute, flip, and soak another minute. Add margarine to a skillet over medium heat and rotate pan so bottom is lightly coated. Add bread and cook 2 to 3 minutes on each side, until lightly browned. To serve, top two slices of bread with a dollop of chocolate nut butter and fruit and nuts, if you like.


Tuesday, April 22, 2014

Salute Mother Earth on Her Day with Eco-Friendly Wine


When the work day is done and it’s time for laughter on the porch with friends, there’s no better accessory than a glass of good wine in your hand. Unfortunately, in these days of rapid climate change, conservation and the wine industry are increasingly at odds. Every time we buy a bottle now, there are lots of questions riddled with eco-guilt: Is it better to buy a glass bottle or paper box? Cork or no cork? Organic or biodynamic? Did this glass of wine displace precious wildlife?

“Viticulture has traditionally been concentrated in places with a Mediterranean climate, in countries such as Italy and Greece and in regions including California’s Napa and Sonoma valleys,” wrote Care2′s Kristina Chew. “As temperatures have risen and rainfall fluctuated and even lessened, growers in search of a suitable climate for their grapes have been moving to other areas, with huge implications for ‘habitat quality.’”

As I reported earlier this year, demand for cooler climate wines, like pinot noir, has grown over the past decade. As climate change causes California’s interior valleys to heat up, vineyards have begun to eyeball the cooler regions of Northern California and Southern Oregon–coincidentally the same limited regions where redwoods flourish. Putting wine lovers in the position of deciding whether their favorite beverage is more important than age-old trees.

Luckily, there are some wine makers that realize the importance of working in harmony with the planet, rather than in opposition to it. Recently, I had the opportunity to taste test some wines from just such an eco-conscious wine maker: Concha y Toro. What I found most impressive about these wines (besides the delicious taste) is the creative ways they’re working to preserve the land in and around their wineries.

The Wine


Gran Reserva Serie Riberas Chardonnay – I typically do not like chardonnay. I find it bitter and dry in the worst ways. But this chardonnay was a pleasant departure. Although the acid was still there, it was muted and palatable. The stronger flavor was of tropical fruit with a soft, clean mineral notes beneath. We enjoyed it with some grilled halibut and greens, and it was delicious.


Casillero Del Diablo Reserva Cabernet Sauvignon – While I love all red wine, I’m typically a pinot noir kind of girl. I like my fruity wines, what can I say? This wine gave me another reason to consider Cabernet Sauvignon with dinner, however. The flavor was rich, but those fruity notes–cherry, black currant and dark plum–were still there to balance out the dryness. We enjoyed it with steak tips with a horseradish dipping sauce and sweet potato mash.

The Conservation

Wine production carries a significant water footprint, but with strong mitigation strategies in place, Concha y Toro uses 25 percent less water to produce a glass or wind than the estimated global average for the wine industry.

As the climate changes, Concha y Toro has chosen to place their newest vineyards in places that are naturally resistant to temperature changes. The “Riberas” or “riverbank” series is cultivated in areas with lower temperatures moderated by natural elements, like nearby rivers, elevation, and ocean breezes.

Like many wineries, Concha Y Toro is responsible for both cultivated and unplanted lands and forests. Rather than clearing these areas, the winery again seeks balance. Concha y Toro is committed to the conservation of 8,000 acres of Chilean native forest planted in harmony with their vines.

Lastly, the bottle. As of 2014, Concha y Toro has been able to reduce its carbon emissions by 3.3 tons, just by using lighter weight glass bottles.

[via Care 2]

Friday, April 18, 2014

20 Eco-Friendly Easter Egg Ideas

No plastic Easter eggs! Make that your mantra, and you’ve just banned quite a bit of the toxicity of Easter. Besides, you don’t need plastic Easter eggs, not when there are both beautiful, vegan alternatives to plastic eggs, and beautiful, creative, unusual ways to decorate traditional, edible Easter eggs.

Want something to fill with candy? This list has it. Want something extra fun and unusual to do with yet another carton of hard-boiled eggs? This list has it.

Vegan Easter Egg Alternatives

  • Egg carton Easter eggs. Bum a few cardboard egg cartons from a friend, and turn them into Easter eggs of your own.
  • Embroidery floss Easter eggs. These eggs made from embroidery floss or yarn are delicate, but quite beautiful.
  • Felt Easter eggs. Using Eco-fi felt (which is made from recycled plastic soda bottles), you can sew your own Easter egg stuffies. Decorate them with buttons and ribbons instead of dye.
  • Papier mâché eggs. These papier mâché Easter eggs are a favorite of mine; the kids can paint them, they’ll last forever, and they hold treats!
  • Pine cone Easter eggs. Painted pine cones make great Easter eggs. 
  • Rock Easter eggs. Rocks are just as fun to paint as eggs. 
  • Upcycled book page eggs. Pages torn from broken books are transformed into three-dimensional eggs. 
  • Wooden eggs. Wooden eggs are fairly easy to source, and you can do so much with them–paint them, color on them with Sharpies, decoupage them, glue on buttons or photos. Your imagination is the limit.

Other Easter Egg Alternatives

  • Felted wool Easter eggs. When my kids were too young to decorate Easter eggs, these Mama-made felted wool Easter eggs were just the thing–big, soft, and colorful! 
  • Felted wool sweater Easter eggs. Sew Easter egg stuffies from prettily patterned wool sweaters. Here’s how to felt wool sweaters.
  • Hollow chocolate Easter eggs. Use the embroidery floss technique above, but substitute melted chocolate–yum!

Natural Easter Egg Decorating

  • Blown-out eggs. Decorate them however you’d like when you’re finished; blown-out eggs will keep beautifully indefinitely.
  • Earth Paint Easter egg dye. Natural Earth Paint makes an Easter egg dye kit that uses the same natural ingredients that you’d use to make your own Easter egg dyes, but in a quick and easy kit form. 
  • Homemade natural dyes experiment. What color would the spices in your pantry turn an egg? Now’s the time to find out! 
  • Plant silhouettes. These dyed eggs show the delicate silhouettes of leaves, stems and flowers. 
  • Ruby eggs. Why dye the eggshell, when you can dye the egg itself? These hard-boiled eggs are dyed in beet juice, so they turn out beautiful and fun, but with no unwanted synthetic chemical coloring. If you use natural food coloring, you can dye your peeled eggs in even more colors. And if you’re still hankering for even more egg dyeing fun, check out Green Living Ideas for more natural egg dyeing tutorials. 
  • Vegetable-dyed Easter eggs. There’s nothing but wholesome, food-based pigment in this dye. Secret tip: to get a beautiful crimson color even more vibrant than food coloring could yield, use yellow onion skins.

Upcycled Easter Egg Decorating

  • Melted crayon Easter eggs. Use up your broken crayons to decorate eggs with a marbling effect.
  • Silk tie Easter eggs. Use those tacky silk ties to make beautifully patterned Easter eggs.
  • Tie-dyed Easter eggs. If you’ve got some junky old fabric scraps that you don’t want to use for anything, then use them to make these tie-dyed Easter eggs; fabric is the key ingredient to create that tie-dyed look on the eggs, but you don’t want to use your nice swatches, obviously.
[via EcoWatch]

Thursday, April 17, 2014

10 Incredible Vegan Recipes You Can Whip Up In 10 Minutes or Less


In today’s modern age of fast-pace everything, we tend to lose sight of what really matters — like quality, nutritious food, for instance. We aim for the convenient and least nutritious over the more healthier, wholesome (but longer to prepare) foods. Let’s take oatmeal for example: there’s the instant versus the slow-cooked oatmeal. The former is laden with sugar, salt, and other unnatural additives, while the latter is a bit longer to prepare, but contains little to no sodium or sugar (unless you decide to add them, of course) and has a myriad of benefits for you in the long run.

Translate that insight into other areas of a supermarket, such as the freezer aisle, and you’ve got yourself a unhealthy crisis. And, since we’ve learned that big food industries aren’t looking out for our best interests, it’s about time we say bye-bye to these processed food giants and make our own foods at home. Here are some easy tips to minimize your consumption of processed foods.

But, it will require time — lots of time that I don’t have, you might say. Nope! That’s only if you want to, of course, but home-cooking does not have to take hours away from your day. It’s all about planning. Know what you want to buy the week or weekend beforehand; designate a day of each week to plan what you want to have for the next. Your next step should be to go to market and bring a shopping list for ingredients you might not have for your upcoming recipes. It should be easy from here. Here are 5 secrets for making quick and healthy vegan meals at home. Just choose a recipe and get cracking! Here are 10 recipes made under 10 minutes or less to get your creative juices flowing:


Wednesday, April 16, 2014

Effective Natural Remedies to Cure Spring Allergies

Spring allergy is commonly used to refer to hay fever, a seasonal allergic rhinitis attack experienced by more than 35 million Americans every year as the season changes and many allergens start to blossom - during springtime. As pollens scatter and travel through air, people as far as hundreds of miles away unknowingly sniff them, triggering allergic reactions, such as sneezing, coughing, eye and nose irritation and runny nose.


Many over-the-counter medications for spring allergies are available at affordable prices. These drugs, nonetheless, can cause several side-effects and unnecessary expenses. Common side-effects include drowsiness, headache and occasional loss of appetite. Why bother experiencing them when there are scientifically proven natural remedies that can aid in fighting spring allergies?

You can try the following alternative treatments for safer and effective relief.

Garlic: On clinical studies, quercetin, a natural compound found in garlic and onion, is observed to mimic the antihistamine effect of certain drugs. When regularly added to the diet, spring may just pass without causing hassle sniffs.

Onion and apple are good sources too.

Cayenne pepper: Like garlic, it also contains quercetin that can act as antihistamine. But more than that, it has anti-inflammatory properties that can prevent throat and nasal irritations. Some people prefer using cayenne pepper because the natural heat it produces in the body is said to comfort irritations caused by allergens.

Thyme: This herb is proven to be an effective natural expectorant that can relieve phlegm production during the onset of spring allergies. Even some drugs add it to their components for much more effective decongestion benefit. It also has high antimicrobial properties that aids in fighting infections caused by phlegm.

To experience its benefits, drink a tea made from fresh thyme twice a day or buy prepared brands that preserve the natural properties of the plant without altering its chemical components.

Chamomile: A healthy and delicious drink, chamomile tea can also relieve itchiness and dryness of the eyes. By placing a cold tea bag for five to 10 minutes, you will feel the immediate effects against allergic reaction.

Elderberries: This fruit is insanely high in antioxidant content and phytonutrients that are best used against flu. As it strengthens the immune system, it also makes recovery from cold faster. Its anti-inflammatory effects can be experienced by drinking fresh juice or even wine made from real fruits.

Chicken soup: Medical experts considered this as a mere hoax until a year ago when a research showed surprising benefits to the recovery rate of subjects experiencing the common cold. Since spring allergy triggers nasal fluid build-up, it is a smart idea to have chicken soup not only on a rainy day but during springtime as well.

Neti pot: Oprah considers this product as one of her favorite things because of its fast action against clogged nasal passages due to allergens. Cheap and natural, it safely soothes the passage using sterile water and a dash of salt.

Acupuncture: This ancient art of healing is said to relieve swollen nasal passages at a faster rate than some herbs do. Acupuncture is also said to strengthen the immune system; thus, strengthening the body's defense against spring allergies, or any kind of allergy for that matter.

Monday, April 14, 2014

Organic Gardening: 10 Tips to Success

Organic gardening is the method of gardening that utilizes only materials derived from living things, ie. all natural plant foods and pesticides. Once you know the basic tenets of this practice, organic vegetable gardening is simple. And the payoff is enormous: no toxic chemicals, no waste, better for the environment as a whole, and not to mention a crop full of natural, delicious vegetables. Remember these 10 steps and you'll have a successful crop in no time!


Soil. It all begins here. Amending your soil with organic material such as composted manure or yard and kitchen scrap compost will get your dirt off to a good start. The inclusion of organic material provides a solid basis of nutrients for your plants which helps to cut down on the need for commercially made fertilizers and improves soil structure making it easier for your plant to absorb the important minerals they need. Sandy soil will not hold its moisture well. Heavy clay soil may prove too dense for healthy root development.

Fertilizer. In addition to compost, your plants will enjoy a healthy dose of other organic foodstuffs like worm poop and pee (we call this worm tea), eggshells, Epsom salts, bone meal, blood meal...the list goes on, but the key word is all-natural. Mother Nature knows what she's doing and these sources provide essential vitamins and minerals for your plants.

Beneficial insects. When planning your garden, educate yourself on which plants repel insects, which plants invite them, and what each bug eats. For instance, ladybugs eat aphids, which is a good thing because aphids will suck the life from just about any plant! By inviting ladybugs into your garden you are employing a natural form of pest control and not toxic chemicals.

Layout. When designing your garden, it's important to adhere to spacing guidelines for your plants. By keeping them close, their leaves will shade the ground beneath them. This not only cuts down on weed growth, but also helps the soil retain water, cutting down on water usage. Organic gardeners are excellent custodians of the environment. Too close, and you'll invite the growth of fungus and disease.

Companion planting.
Including a wide variety of plants in your garden and planting them according to their relationship with others helps in many ways. For instance, bean plants fix nitrogen into the soil, which corn plants use to produce healthy cobs. Corn provides support for the climbing vines of the bean family. Add squash to the base and you have instant weed control!

Crop rotation. This is the practice of rotating a plant's location from season to season. Relocating your plants cuts down on soil depletion and disease infestation. In addition, plants like beans will actually put nutrients into the soil that can be used by the next crop, ie. corn. Disease will be reduced because the organisms that infect one plant pose no harm to the next, so rotating eliminates the likelihood a disease will spread.

Water.
Conserving water is a key component of organic gardening. Good watering practices include the capturing and storing of rain, the use of drips hoses, and plenty of mulch. With a sprinkler system, a large amount of water can be lost to evaporation. If sprinklers must be used, it's best to water in the early morning or early evening hours. Using mulch around your plants is another way to conserve water because it keeps the soil moist longer, requiring less water to be used.

Weeds. Weed removal is best done by hand, without the use of chemicals. While tedious, this duty can be cut down tremendously by the use of smart planting. Remember, keeping plants close helps prevent weed growth. Natural mulch is another great method. Not only does it help prevent weeds, it has the added benefit of providing nutrients into the soil as it breaks down.

Cover crops. These are the plants you grow in between seasons. They help to replenish the soil with vital nutrients and prevent soil erosion. They can also be used to feed the beneficial insects in the absence of your vegetable crop and keep weeds at bay.

Seeds. Organic gardening is all about using sustainable methods and what better way to be self-sustaining than to use your own seeds! The practice of saving seeds has been around for centuries and ensures you "know what you grow." But to ensure purity and avoid cross-pollination, you must keep some distance between the same plants of different varieties. You don't want to be disappointed when you plant those tomato seeds next year and discover the result is a hybrid--and not the decadent beefsteak tomato you were looking forward to. Only heirlooms can produce the original fruit, not hybrids.

Organic vegetable gardening is all about sustainable practices. It's conservation at its best, because you are using what you have and what you can find in nature. From fall leaves to leftover food, you waste nothing in an organic garden. Plants help each other, insects play a role...why even Mother Nature helps by delivering an extra shot of nitrogen in every rain drop!

But more than being a good steward of the environment, organic gardening makes for a healthier you.


Thursday, April 10, 2014

Four High-Protein Vegetarian Alternatives to Soy


Vegetarian Protein Foods Not Named Tofu or Tempeh

“Four Alternatives” list: four high-protein, non-soy, vegetarian foods.  A lot of people seem to think soy is the only decent source of protein out there for vegetarians.

Seitan

For a long time, I thought seitan was another soy product.  Turns out, it’s made mostly from wheat.  And it has a texture very similar to meat, earning it the nickname “wheat-meat.”  A four-ounce portion of seitan has between 20 and 30 grams of protein, making it the most densely-packed vegetarian protein source I know of.  That it could pass for meat in a vegetarian dish is pure bonus, even if it’s not quite a whole food. You can find seitan at most health food stores, but if you are feeling adventurous, you can make it at home.

Beans

Nothing new here; beans are a staple of almost every vegetarian athlete’s diet.  My favorites are lentils, chickpeas and black beans, but almost every starchy bean contains 12 to 15 grams of protein per cooked cup.  Soybeans, interestingly, contain the most of all (29 g per cup); perhaps that’s why soy plays such a big role in many vegetarian diets.  Lentils, at 18 grams per cup, come in a distant second.

Quinoa

Some call it a super-grain; technically it’s a pseudo-grain.  Quinoa is actually a seed, and it comes in at 11 grams of protein per cooked cup.  It has the benefit of being gluten-free, too.  Quinoa contains a bitter coating that helps it to avoid being eaten by birds, so rinse your quinoa well before you cook it.  (Cooking only takes 12-15 minutes in hot water.)  Quinoa makes a good substitute for rice as part of a high-protein vegetarian meal.

Broccoli

Chances are, you’ve never thought of broccoli (or any green vegetable) as a high-protein food.  But per calorie, vegetables like broccoli and spinach are very high in protein.  The “problem” is that they take up a lot of room in your stomach, so it’s hard to eat enough of them to make them a significant source of protein.  Still, at 5 grams of protein per cup, broccoli deserves a place on list, if only because it’s interesting.

Wednesday, April 9, 2014

10 Foods That A Nutritionist Always Has In Her Freezer

People often think that eating healthy takes way too much planning and preparation. Either they hate grocery shopping every week or don’t feel as though they have the time to do so. Luckily, the freezer can make your life much easier.

Here is a list of what nutritionist, Kristy Rao, always has in her freezer to ensure that she's eating healthy even when she doesn't have enough time to go to the farmers' market:

Frozen fruits and vegetables


This is key for always being prepared to make a smoothie, even when you haven't been to the grocery store in a while. One great thing about having frozen fruits and veggies on hand is that you often won't even be able to find the same organic fruits or vegetables unfrozen. I freeze ripe bananas myself and buy bags of raspberries, blueberries, strawberries, peaches, spinach and kale. In the summertime, I tend to have leftover watermelon, which I also freeze in chunks.

Ezekiel bread and muffins


Since I dont eat bread often, I keep it frozen. I take out a couple of slices or muffins at a time depending on how much I feel like having, so that the rest remains fresh. I choose Ezekiel bread because it's made with sprouted grains and beans and is fully organic. Although there's still gluten in this bread, it's still easier to digest than traditional bread.

Homemade popsicles


All you have to do is purchase BPA-free popsicle molds, blend up your favorite smoothie, and pour it into the mold to freeze. I recommend sweetening with honey or organic agave syrup.

Juice or coconut water ice cubes


I will fill my ice cube trays up with organic coconut water and freshly squeezed orange or apple juice to throw into my smoothies for sweetness. The orange cubes are also great to put into a glass of water for taste.

Organic, gluten-free waffles


I typically make my own and freeze for a rainy day, but you can also purchase these. They're one of my favorite treats for breakfast.

Oat and spelt flour


I never use white flour. These are great alternatives, and are best kept in the freezer to keep fresh.

Acai


I love making smoothies with unsweetened acai berry packs, and usually use half a pack for a smoothie.

Coconut ice cream


This is one of my favorite not-so-guilty pleasures, because you can get organic, non-dairy and low glycemic coconut ice cream. It's perfect for a treat that won't make you feel terrible!

Blue-green algae


I know it sounds scary, but blue-green algae is extremely good for you, and you won’t even taste it in your smoothie!

Dark chocolate


How could I possibly risk running out? I always buy an organic bar with 70% or more cacao content.


10 Green Ideas For Earth Day


Got big plans for Earth Day? It's right around the corner, April 22, but feel free to celebrate all week long with these 10 great ideas for teaching kids about Earth Day and what they can do to help take care of our planet.

1. Serve up eco-snacks.
Mix up some trail mix (with raisins, sunflowers, peanuts, almonds, chocolate chips) assemble one of these cute flower-power veggie trays, or whip up a batch of these yummy Earth Day bars. Celebrating the global nature of the ingredients (raisins from California, chocolate from Africa, coconut from the Philippines) is a cute idea, but it's still a good idea to look for locally sourced ingredients whenever possible!

2. Make a nature craft. Try your hand at one of these cute nature craft ideas, or get creative and come up with your own eco-masterpieces. 

3. Host an Earth Day 5K (or 1K). This may seem like a big endeavor for Earth Day, but don't let it scare you. Even if you don't decide to do a big community-wide event, you can still challenge your friends and neighbors to a run or walk in honor of Earth Day. It's the perfect way to get out and enjoy the planet and the day.

4. Take a walk. If an organized walk or run is too intimidating, you can still get outdoors for a walk around the block or local park with your own family. Check out these tips for exploring the outdoors with your kids.

5. Pick up a great green read. "The Lorax," "The Omnivore's Dilemma," "Seeds of Change," "The Giving Tree," "An Inconvenient Truth." There are so many great green reads to choose from. Check out MNN's book posts to find an old favorite or a new one to read in honor of Earth Day.

6. Plant a garden.
Grab the kids, a shovel, and some seeds and hit the dirt with your family. Whether you plant one tomato plant in a pot or a large garden of fruits and veggies, gardening with your kids wil teach them about the cycles of nature and the beauty of growing your own food.

7. Watch an eco-flick. Snuggle up on the sofa with your kids and your favorite brand of organic popcorn to watch one of these family friendly eco-movies. In the mood for a sobering documentary? Try a classic like Al Gore's "An Inconvenient Truth" or a newer film like "Lunch Line," "Waiting For Superman," "The Cove" or "Fat, Sick, and Nearly Dead."

8. Host an eco-swap. What better way to get rid of your old stuff than to give it to friends who will find another use for it? Gather up your friends and neighbors for a good old community swap where everybody brings a bag or two of stuff (clothes, toys, you name it,) and then goes home with a bag or two of newish items in exchange.

9. Recycle. Recycling is a great way for kids to get involved in taking care of the planet. Talk to your kids about the items that wind up in the recycling bin and how they can be recycled into new products. Or you can also check out some of the recycling opportunities available from groups like TerraCycle where you can earn money for your school or community organization by collecting items like candy wrappers or juice pouches so that they can be remade into cool new stuff.

10. Bring it home.
Earth Day is the perfect day to talk to your kids about the green steps you take around the house to protect the planet and how they can help. Turning off lights and faucets, recycling, keeping the heat and air down low, and cleaning green are great ways to teach your kids about your family's impact on the planet, and the steps that you can all take to minimize it.

Tuesday, April 8, 2014

6 Food Myths Debunked

Don't completely ditch fat-free dressings, and feel free to eat some white vegetables.

Nutrition advice comes so fast and furious, sometimes it’s hard to keep track of what’s good and what’s bad for you. And oftentimes when that advice is boiled down to a hard and fast rule, that rule becomes, well, slightly untrue. So TIME asked some nutrition experts to identify the more common food myths we hear, and the truth behind them.

MYTH: Microwaving foods kills nutrients

Microwaving is actually among the more preferable ways of keeping all the good things in foods like vegetables intact. Boiling can leech out valuable vitamins and minerals, but because microwaving heats up food without using a lot of water, it helps foods to stay nutrient-packed.

MYTH: The more grains, the better

While grains are certainly preferable to refined white flour because they contain more fiber and vitamin B, don’t fall into the multigrain trap. Just because a product has multiple different grains doesn’t mean those grains aren’t processed and stripped of many of the good things you want from them. “In processing grains for convenience, you’re potentially losing the nutrients and changing the degree to which they are absorbed,” says Nicolette Pace, spokesperson for the New York State Dietetic Association.

Check the label and look for the word “whole” before any grains listed. And make sure the whole grains are the first thing among the ingredients, which confirms that they make up the most important part of the food.

Another clue is the fiber content. “If you’re seeing than an 11-cracker serving contains 1g of fiber, there’s probably not a lot of whole grain in there,” says Pace.

MYTH: Fat-free salad dressings are healthier

Fruits and vegetables have fat-soluble nutrients that need fat in order to work–like the lycopene in tomatoes, which has been linked to lower cancer and stroke risk. Opting for a fat-free dressing may deprive you of those benefits. Try olive oil-based options instead, or add avocados and nuts, both of which contain healthy fats, to your salad instead.

MYTH: Avoid white vegetables

Nutrition experts advocate for colorful foods – the brighter, and more diverse the rainbow on your plate, the better. And that’s still true; carrots and strawberries are high in beta carotene, an important antioxidant that fights damaging inflammation in cells, and dark green produce is a rich source of antioxidants, fiber, calcium, and vitamins like C and K.

But that doesn’t mean that their white cousins are nutritional failures. In fact, cauliflower, garlic, onions, mushrooms, and, yes, even potatoes are good sources of fiber, antioxidants, and potassium. And while the white potato has become tuber non grata for dieters, adding a moderate amount of potato to your diet won’t derail weight entirely. In fact, because it’s so full of fiber, a little goes a long way toward making you feel full and eating less overall. “It’s something you can use as a vehicle to build a meal,” says McDaniel. “If you add broccoli and little bit of cheese, it can be a satisfying meal for someone trying to lose weight.”

MYTH: Juice cleanses are cleansing

“People think juice cleanses are a good way to detox the body,” says Jennifer McDaniel, spokesperson for the Academy of Nutrition and Dietetics. “But I remind my clients that you have a built-in detox organ, the liver, and it’s very good at what it does.” It probably won’t harm you if you go on a juice cleanse for a day or so, but as a way to lose weight, it’s not such a good idea, since it deprives you of proteins and fats, and may lead to losing muscle.

MYTH: Coffee will only make you thirstier

While the caffeine in coffee is a diuretic, meaning it draws water out of your body, the amount of water in coffee means that overall, it can be a thirst quencher. Water is still your best option to stay hydrated, but don’t avoid coffee if you’re a regular java drinker because you think it dehydrate you.

[via TIME]